Checks Design : How can I create and Design your own Check
Anyone can complete the Wire Checks Tutorial by following the provided instructions. You have learned how to create a checklist from this post.
I created a thorough guide on how to wire a cheque to your client for simple pay out last year called Wire Checks guide. I wired the cheque through the Amazon website in that article. We are use a separate website in this essay. Carefully follow the instructions below.
Also Read : Best Credit Card For 18 Years Old and Below
How wire check works
When using wire checks, you purchase blank cheque paper from online retailers and fill it with bank records before giving it to the client to sign and cash out.
Information Needed
- Client Name First and Last
- Client Address
- Bank Logs Info like :
- Name on the bank log
- Address on the bank log (Goggle the routing number to get the address)
- Account number
- Routine number of the bank log
Wire Checks Tutorial : Checklist Design 2022
1. We are going to use extra value checks website, so go to https://www.extravaluechecks.com
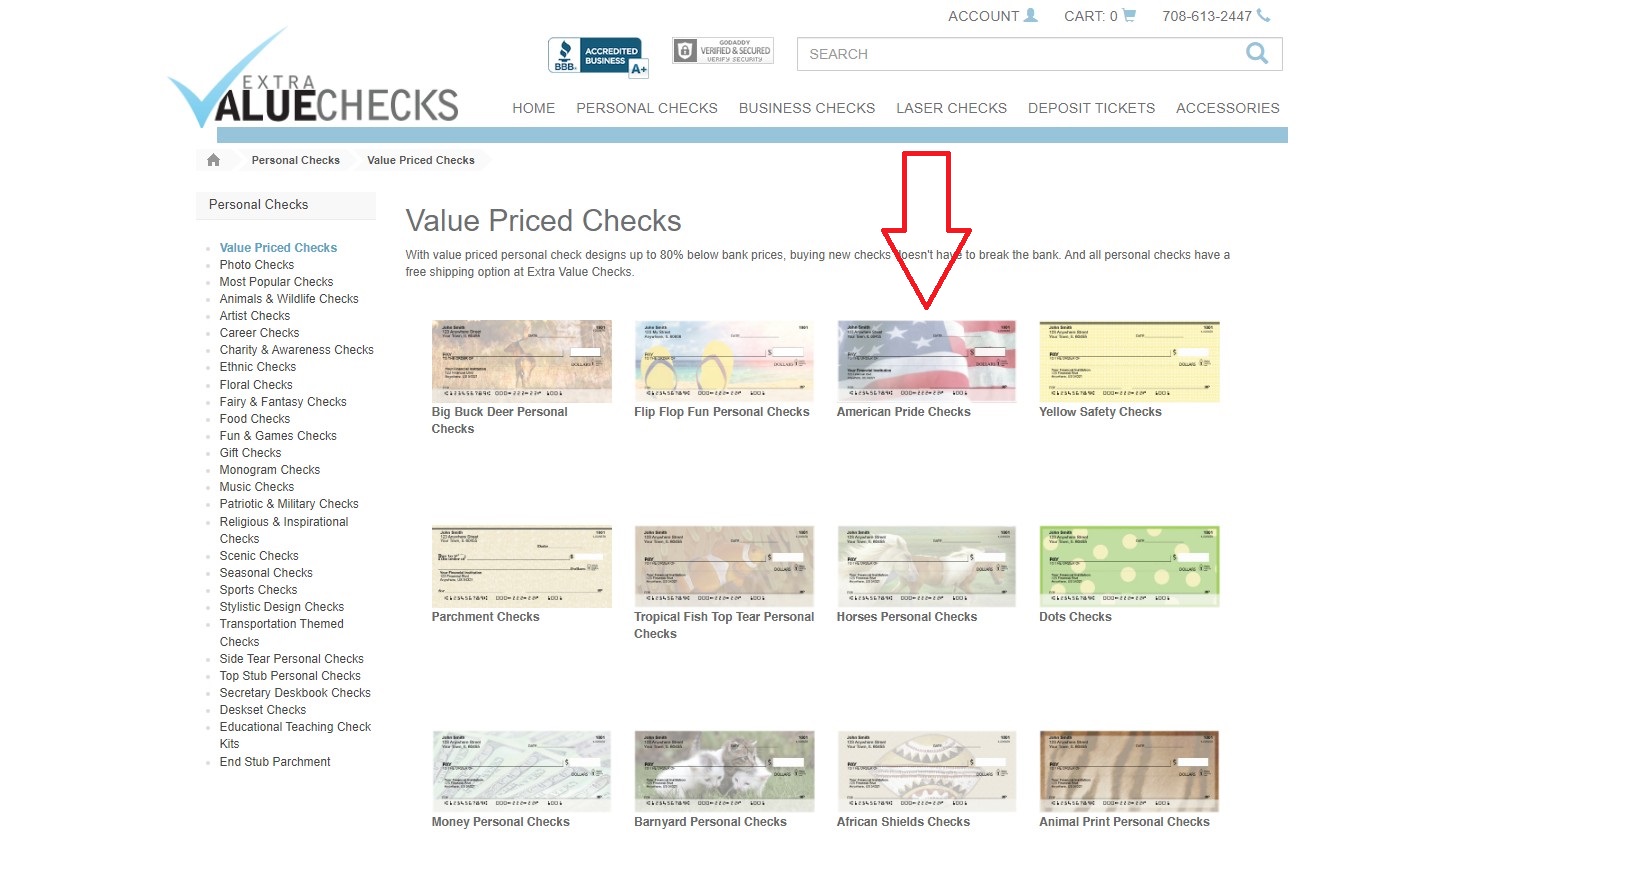
2. There are a lot of different checks design you can choose from, I'm selecting Value Priced Checks.
3. Under Value Priced Checks, you can select any Check list Design, I'm selecting American Pride Checks.
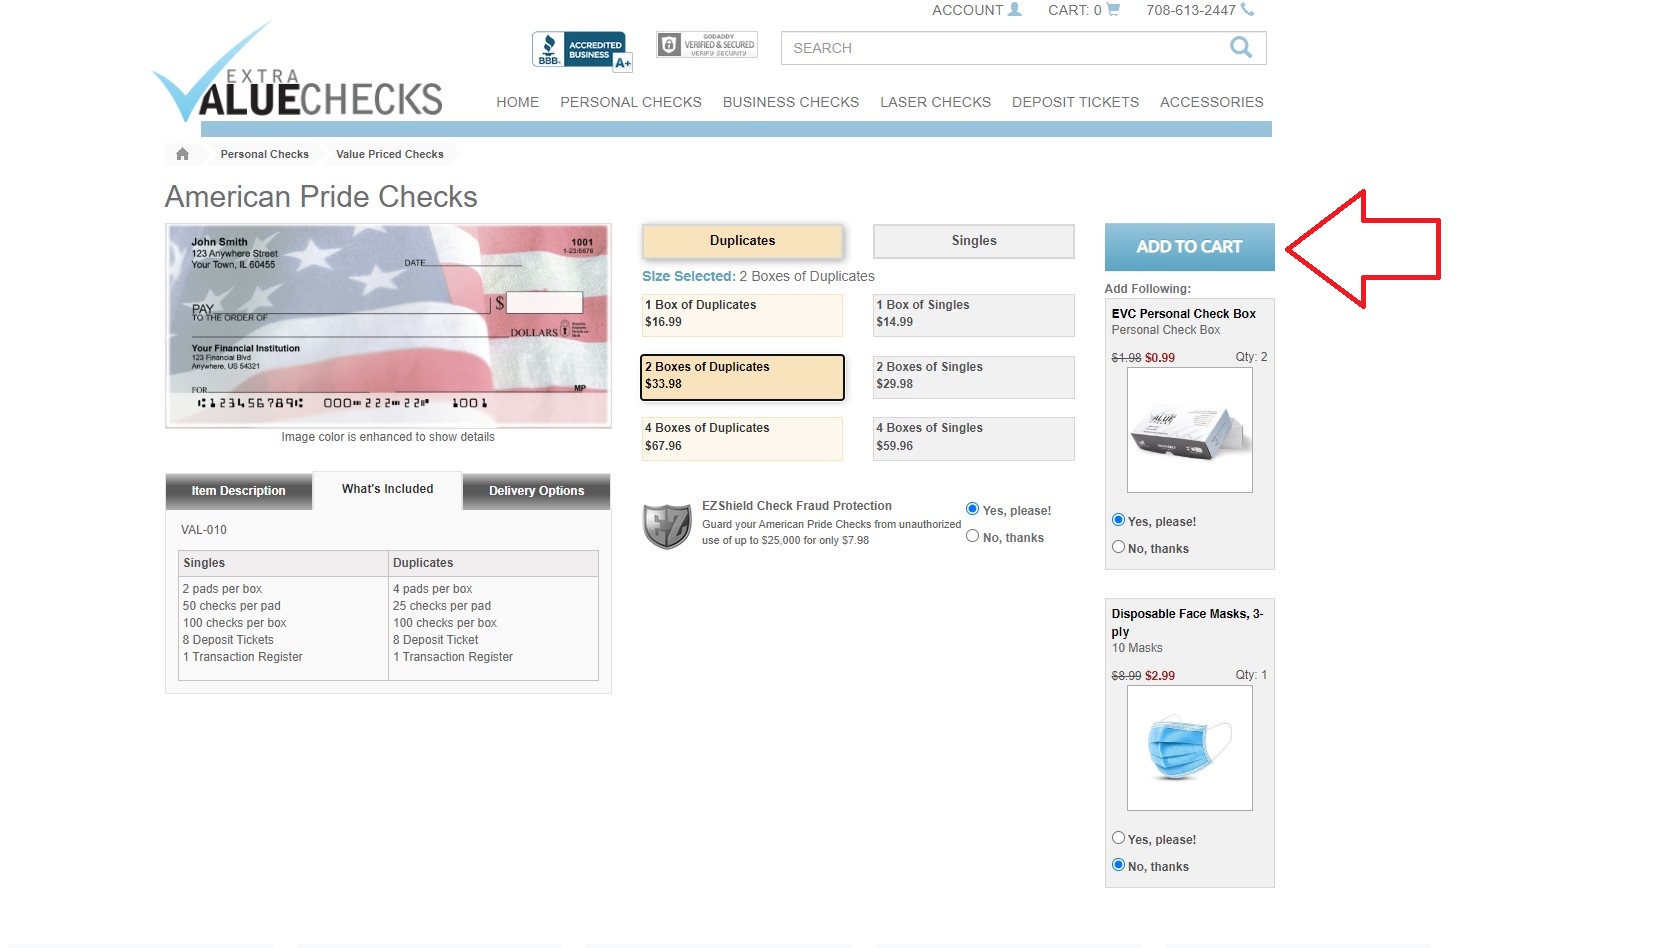
4. Tick the Fraud Protection as Yes, Disposable face option, NO
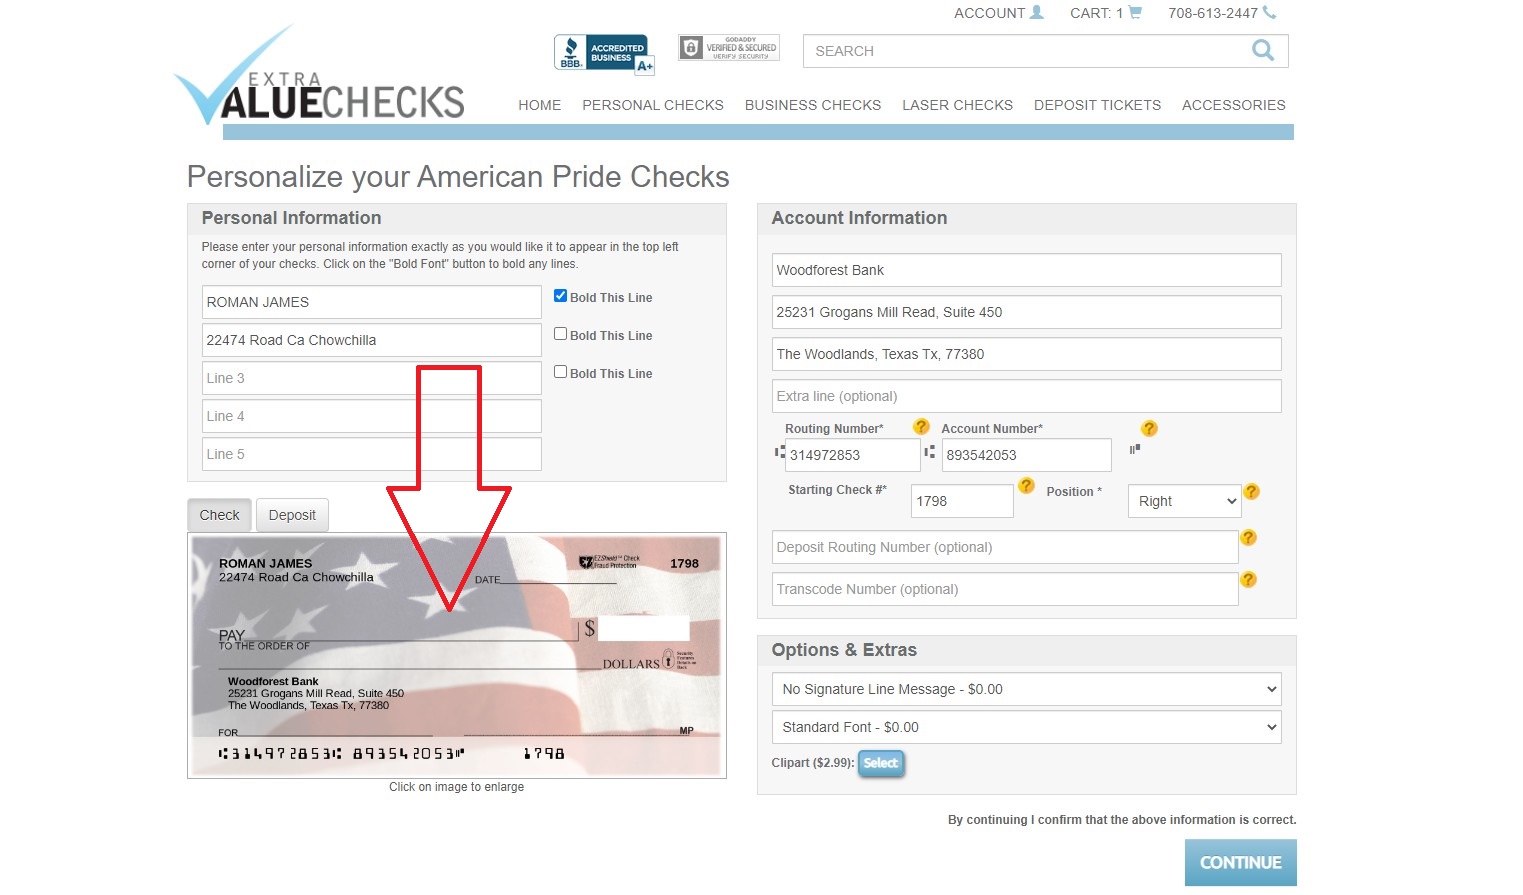
5. Then click on Add to Cart
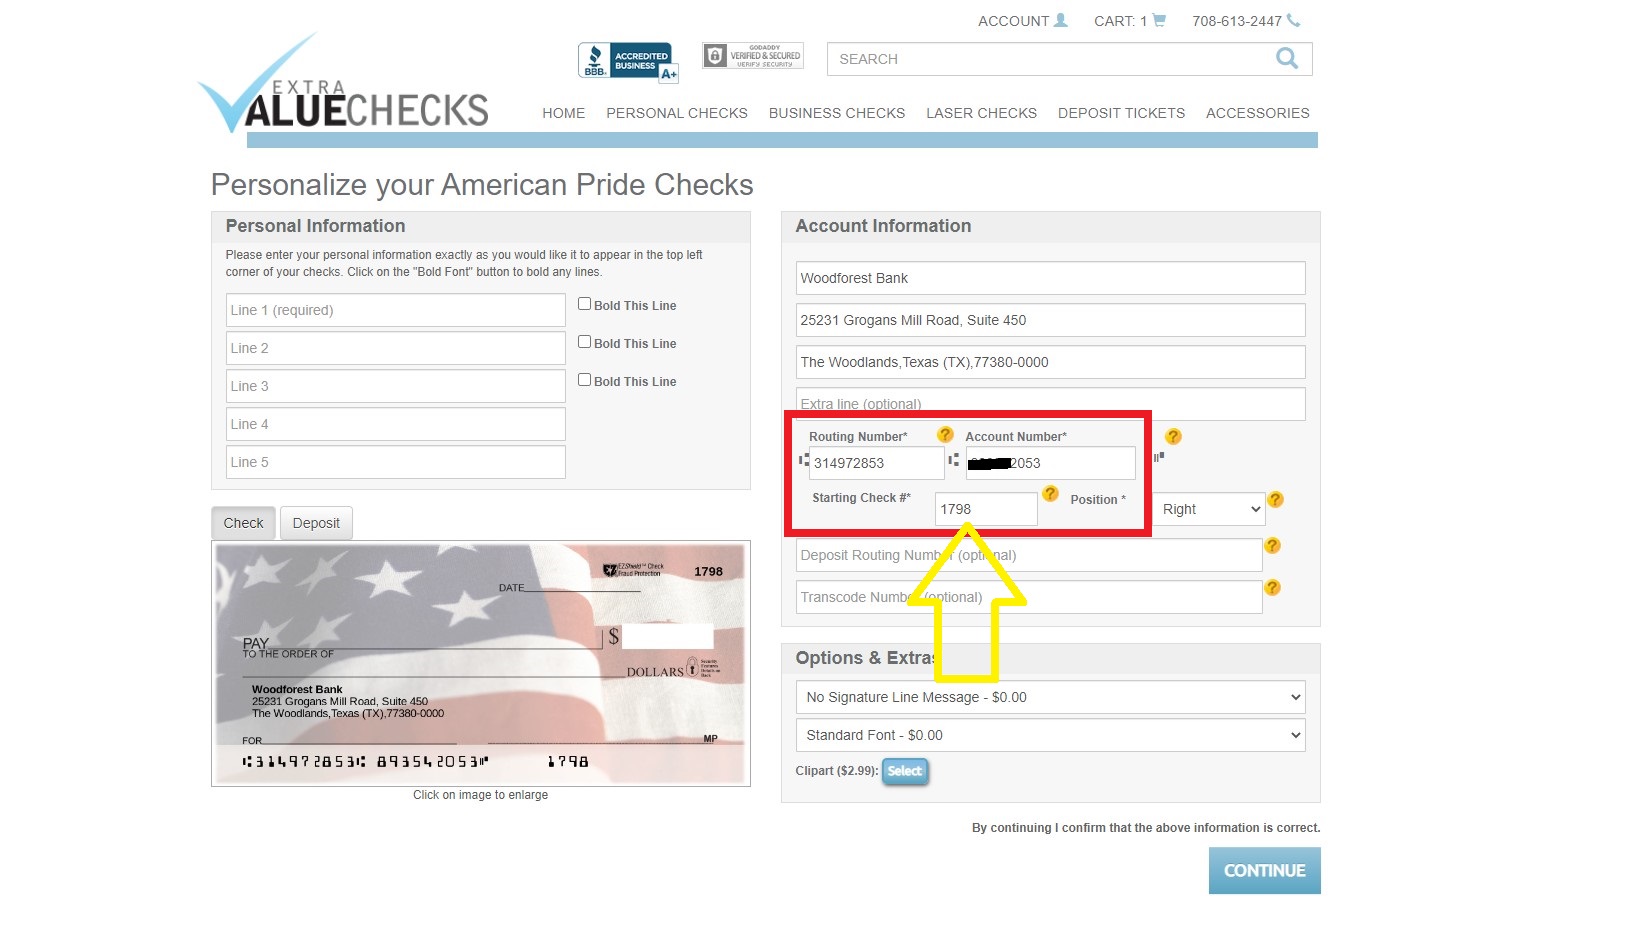
6. Fill in your bank logs details here by entering the Bank name, bank Address (Goggle the routing number to get the address)
7. Continue Filling the Bank information by entering the Routing and Account Number, Set a 4 digit pin.
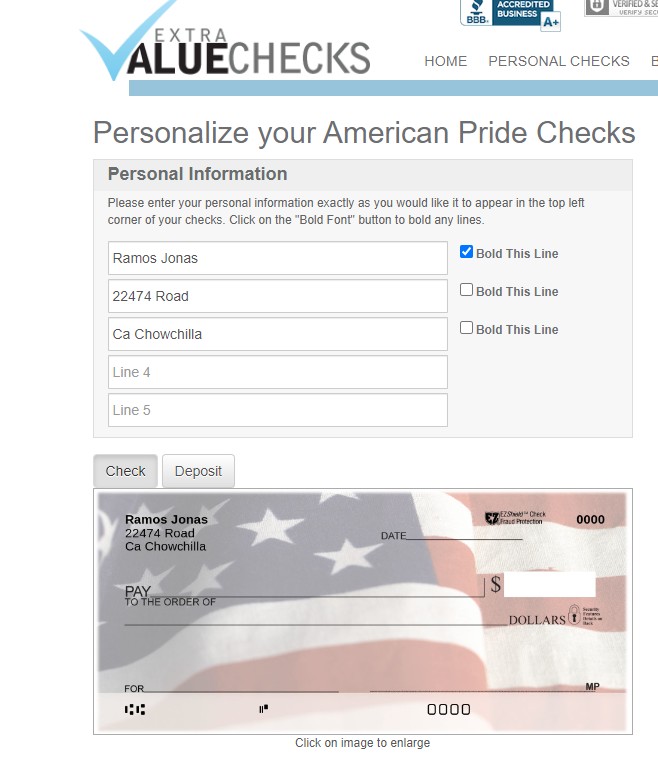
8. On the other left page Enter the Bank logs Name and the Address it comes with
9.This is how the check is going to look without date and other details
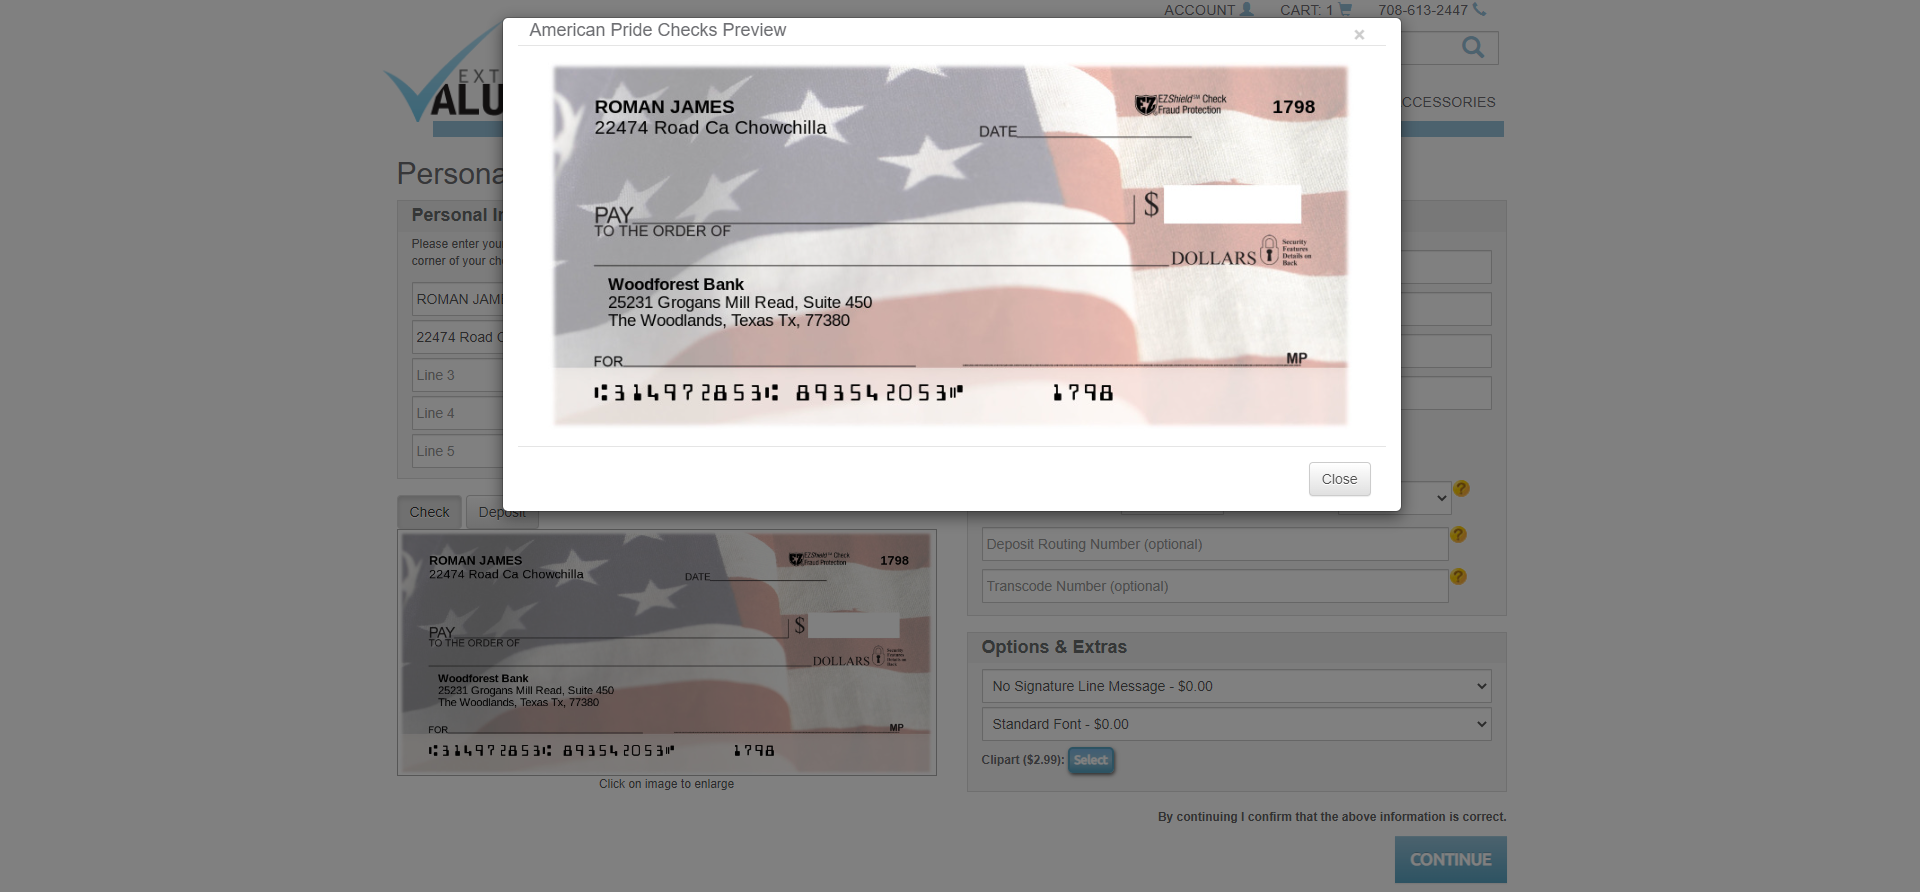
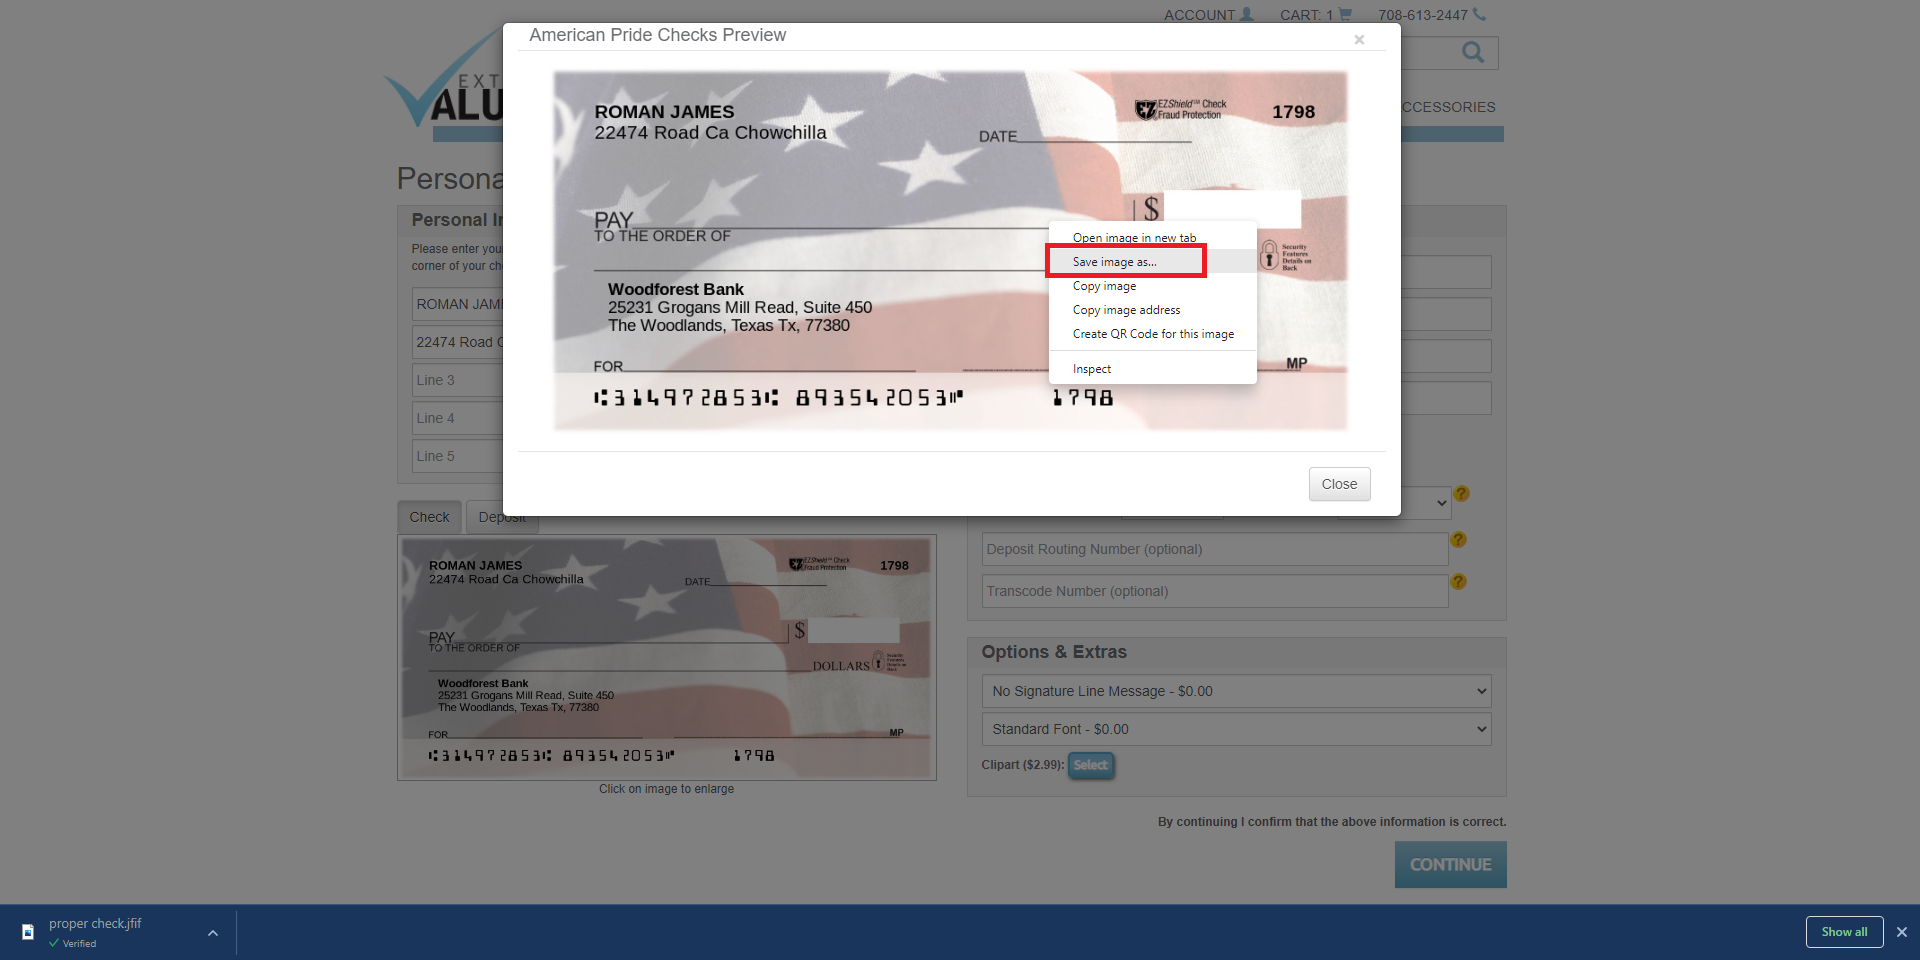
10. Click on anywhere of the design check and preview it
11. Since we don't want to pay for the rest of the edit right the design and Save as
You may Also need to Read : How to Change Banks in Canada 2022
How to Edit the Design Checklist With Windows Paint
Required Tools
- Lucida Handwriting font (Download here)
- Windows Pint or Photoshop
- Blank Back Check (Just google it)
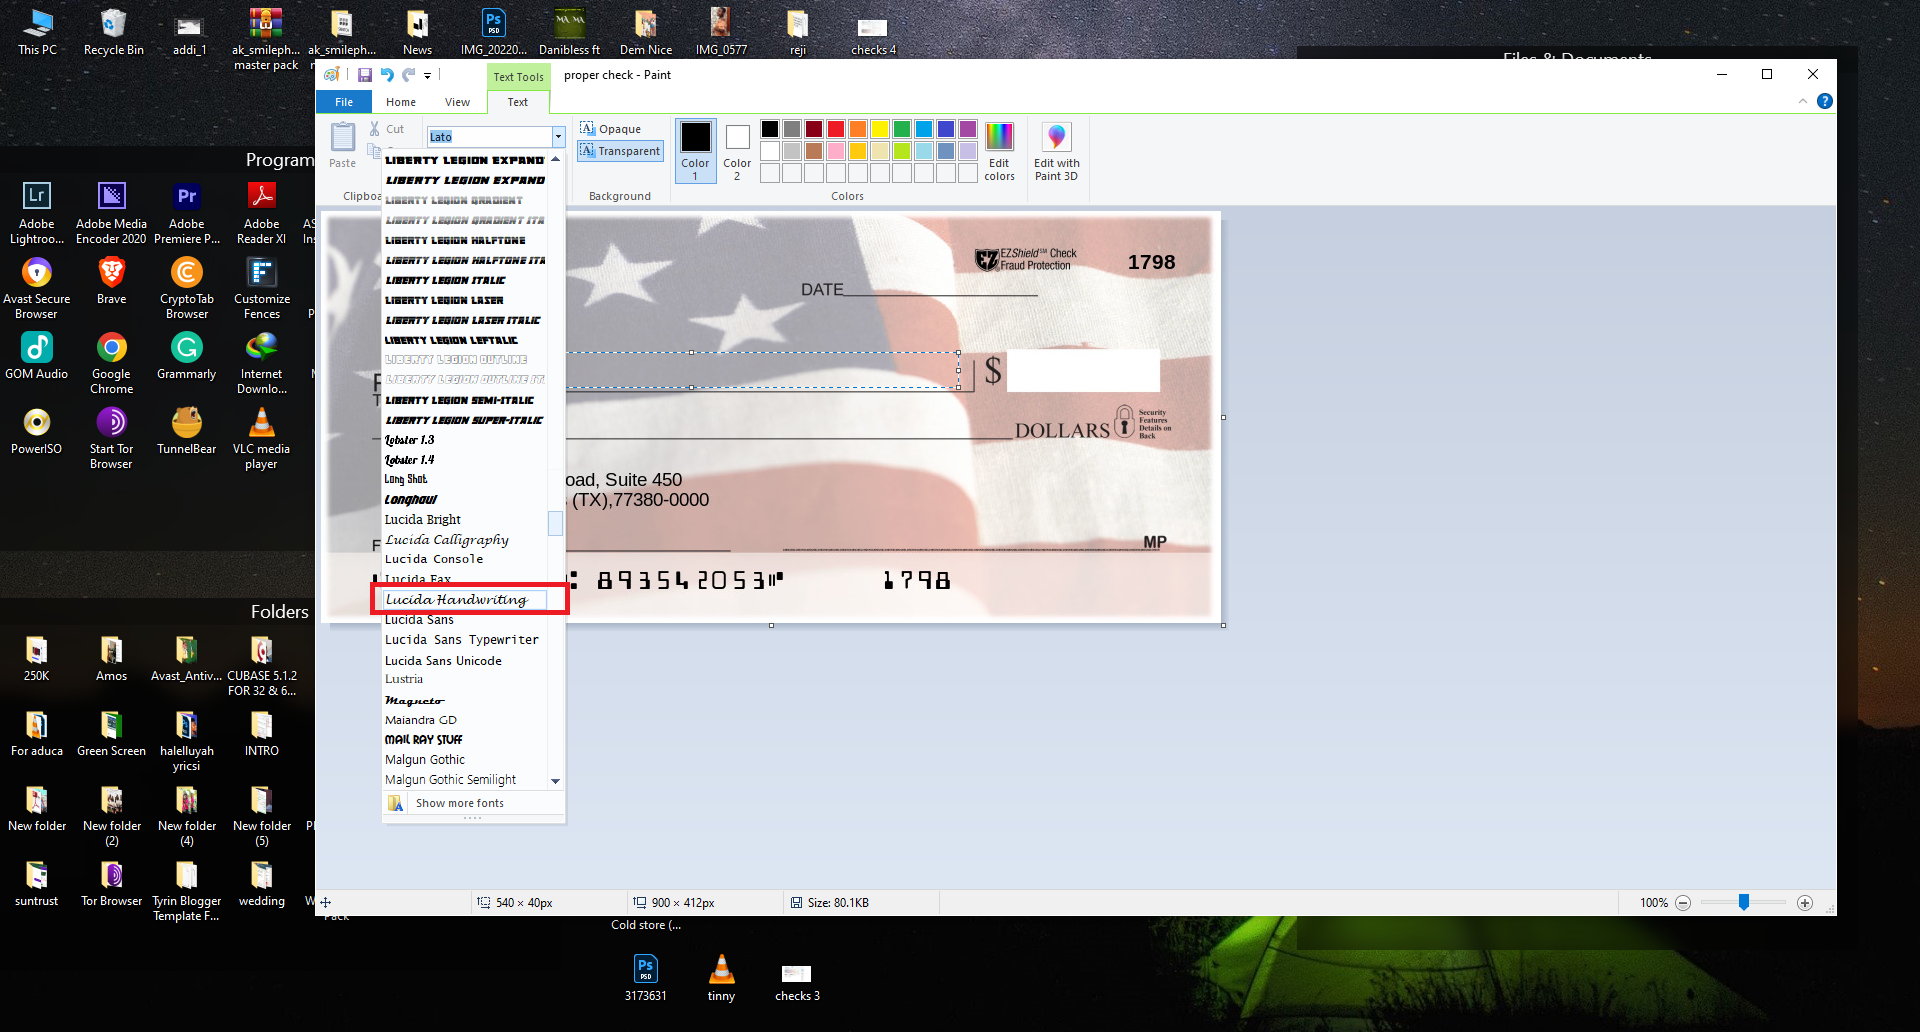
12. Right click on the Design Check you saved earlier then Open with ------> Paint
13. When its open Click Text A, Change font to Lucida Handwriting, Font size to 18
14. Write the Receiver Name in the Pay section
15. Write the date you wrote the check like this
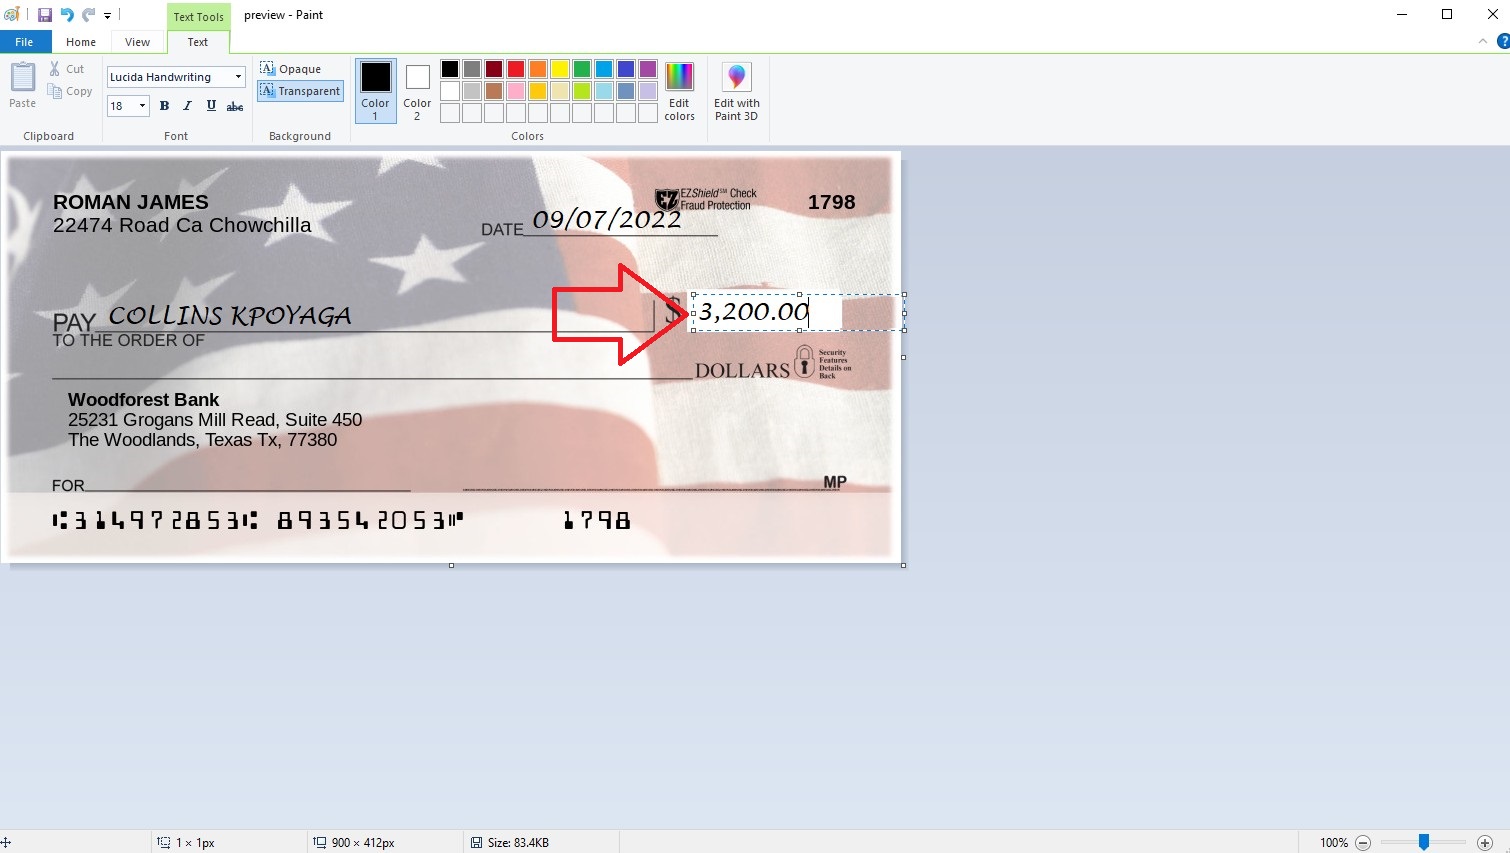
16. Write the amount you will wish to write on the like this (Use the same Lucida Handwriting font)
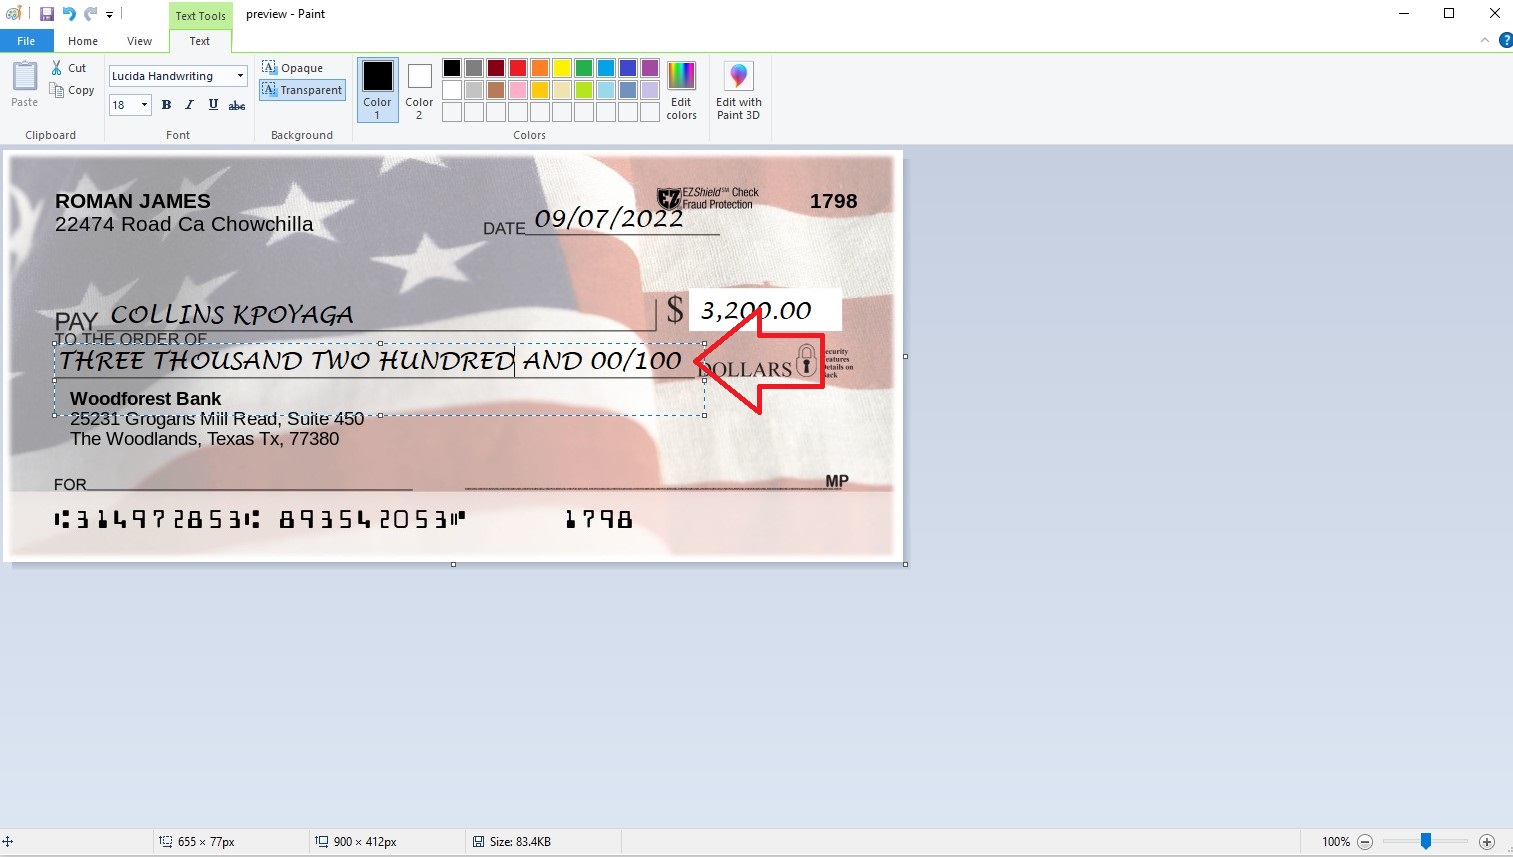
17. Write amount you wrote in words like below :
You may also Read : 911 re Alternative: Best Socks5 Shops To Go For
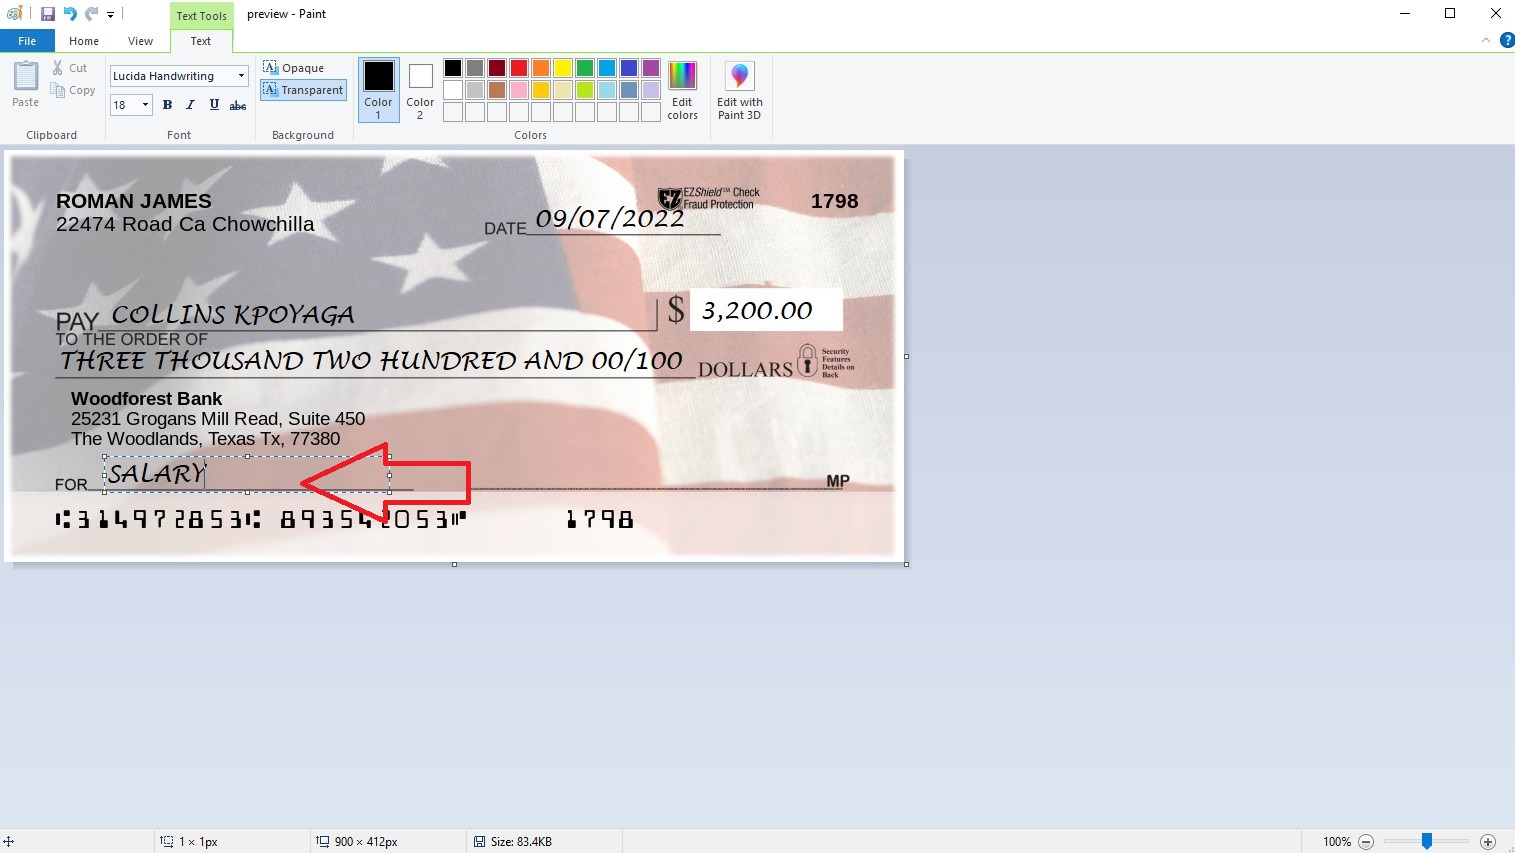
18. You can enter For Salary or Bills, School fees etc.
19. Now small cap-lock for signature using the same font
20. Final editing should look like the below :
Conclusion
In my next Tutorial I will teach you how to mail check to your client like I did in the How to run Bill Pay. If you have any question leave it in the below comment section. Avoid buying any log from anyone that says he sells logs in the comment section.
{getButton} $text={Get Updates From Us} $icon={download} $color={blue}









Is the banklog info that we’re looking for like the acct number and route number from the client or i have to buy a banklog???
ReplyDelete